Category Archives: Uncategorized

OneTrust / CookiePro script replacement type=module

OneTrust and CookiePro are two versions of the same cookie consent product from OneTrust. We use one of these tools on many websites to allow users to consent to cookies, there is a control panel where you can configure the UI etc and it is fairly unobtrusive compared to some cookie consent products.

Typically once you have configured and added the cookie consent banner to your site, it won’t actually stop cookies (especially 3rd party ones) unless you configure your site not to load 3rd party scripts until the requisite cookie category consent has ben provided by the user.

There is a load of documentation on ways to do this.

The simplest, for 3rd party script tags, being the JavaScript Type Re—Writing. Instead of

<script>

or

<script type="text/javascript">

you change this to, for example,

<script type="text/plain" class="optanon-category-C0002">

and OneTrust will automatically load the script after the user accepts cookies for the category specified (C0002 = performance category) both on 1st and subsequent page loads.

However, what if your 3rd party script was a module i.e.

<script type="module">

I could not find any documented means to get OneTrust to load the script with the correct type=module, so had to improvise with this script instead:

 <script type="text/plain" class="optanon-category-3">
    const myscript = document.createElement('script');
    myscript.src = 'https://3rdparty.domain.com/my-app.js';
    myscript.type = 'module';
    document.body.appendChild(myscript);
</script>

This seems to work perfectly well and better than other hacky workarounds I tried such as loading the script in the OptanonWrapper function or using the OneTrust.InsertScript or OneTrust.InsertHTML helper methods.
Download and Combine all Rackspace Cloud Files/CDN access logs

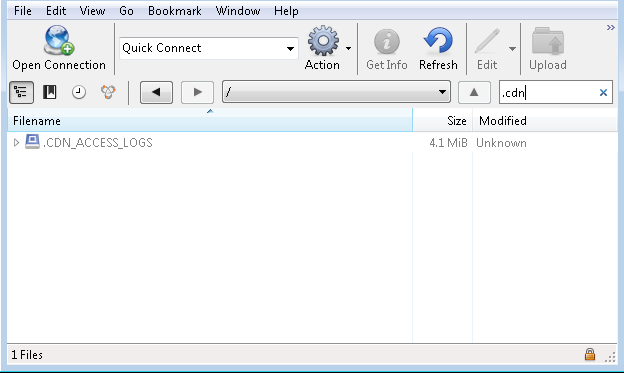
Rackspace Cloud Files / CDN can have access logging enabled on a container, which will log to another container named “.CDN_ACCESS_LOGS” in a folder structure for year/month/date/hour and multiple gzipped log files in each hour folder.

This post gives a bash script to do this but on Windows without a bash interpreter or Python etc I wanted an alternative.

To review these all in one file, use https://cyberduck.io/ to log in to browse the files, using username and API key. Search for .cdn to expose the hidden access logs folder.

081216_0929_Downloadand1.png

Double click to Open it and choose the sub folder you need to review. Right click, Download To, and choose somewhere to save it.

Then you’ll have the folder structure on your machine. Search in the folder for *.gz and select all, move to a single folder so they are all in one place.

Select all .gz files, right click, 7-Zip, Extract to here.

Now you have all the .log files in one folder. Review with your favourite log parsing tool, or to combine into one .log file, open a command prompt to the folder and enter “type *.log > c:\temp\all.log” which will crudely combine them into one file. Not in any order mind.


Capture querystring on New Relic .NET Agent

New Relic by default only captures request URL excluding querystring. This shows on transaction traces and errors etc.

Just spent ages reading the docs to figure out how to get it to include querystring, which is confusingly referred to as Request Parameters (which I thought referred to things such as server variables)

Anyway it is as simple as adding this into the newrelic.config under <configuration> :

<attributes enabled="true">
<include>request.parameters.*</include>
</attributes>

Then all querystring parameters are recorded. I think instead of * you can specify particular named parameters if you need to. Not sure if this captures POST parameters too so be careful not to record sensitive data (maybe don’t do this on an ecommerce site for example).

Respond to address selected JavaScript event with PostcodeAnywhere Capture+

Capture+ allows you to pop some code in your page and configure a JavaScript-driven address finder through your browser.

We wanted to hide the address fields until you select the address from the postcode lookup.

It doesn’t appear to let you customise the JavaScript in any way to allow this, however a query to their support turned up that you can respond to the event when a user selects an address with the following JavaScript:

<script type="text/javascript">
    capturePlus.listen("load", function(control) {
        //custom code
        control.listen("populate", function(address) {
            console.log("User selected: " + address.PostalCode);
			        });
    });
</script>

As this isn’t documented anywhere on their site I thought I would post it in case anyone else needs to know how to do this!

UPDATE: Actually it is documented at the end of http://www.postcodeanywhere.co.uk/support/articles/article/getting-started-with-captureplus

Debug compiled code on a remote server

This might come in handy sometime if you really need to debug something on a server where you can’t run (or connect to) a remote debugger.

  • Upload the codebase (src and sln) to the web server (from the correct branch)
  • Open sln in Visual Studio 2012 Express on the server
  • Change web config debug = true
  • Open web site project properties, web, set the server to Use Custom Web Server,  put the site URL in
  • Press play
  • You are now debugging on the server

Remote Desktop Connection Manager

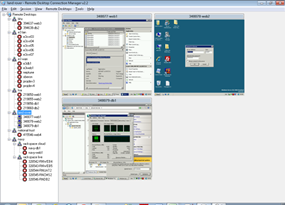
If you have a lot of servers that you connect to remote desktop, then this tool is for you. You can organise your servers into a folder structure, set up default connection settings on folders that are inherited down to each connection, and save login details (encrypted against your user account).

Then you can connect all servers in a group at once, see (and interact with) many screens at a time, or switch between servers easily. Basically makes having multiple RDP connections much easier.

You can download the tool from http://www.microsoft.com/en-us/download/details.aspx?id=21101 or read more at http://blogs.technet.com/b/exchange/archive/2010/06/11/3410093.aspx

Setting up a remote PTZ webcam

I recently bought a cheap PTZ webcam from eBay which I was amazed you could get for under £30 and had some fun setting it up as a webcam for watching Poppy.

Search for wireless ip camera, buy it now, In the UK, sort by price & postage, and buy the first one that looks like this (there’s various colours available):

m7biqfU9g9VGe6a7leWqmKA


It has built-in wifi, ethernet, microphone, speaker, infra-red lights to see in the dark. And you can control it remotely!

Set up is not for the non-technical, and the manual (if you get one) is likely not very readable, but if you enjoy networking you’ll be fine. It can be done just thru a web browser like configuring a router, or you can try to use the software supplied. I think it advertises a public wifi access point by default, so you can connect to this and browse to its IP address to configure it (give it your wifi details). If that doesn’t work you can connect it to your router over ethernet and you should find it on your local network.

Once you can access it on your LAN, you can get an app on your mobile device of choice. Most IP cam viewer apps should work, my favourite free one was CamViewer for iOS – it’s free and you can control the video full screen by holding corners of the screen. When you hold it portrait you can also do audio, change resolution, etc.

You can access it from anywhere if you set up port forwarding on your router to direct a port on your public IP to your cam’s IP. If you have a dynamic IP you need to use some kind of dynamic DNS provider such as no-ip.com or dyndns.org or the freebie one that might come pre-setup and written on the base of your camera!

You might want to set up a custom webpage where you can view and control your camera. There is help for you in the form of DigitalHam. This guy figured out that the camera accepts control requests at a specific URL where you supply username, password, and control param. His demo cam example is here. I made one too but the cam is offline most of the time now. View source to check it out.


Traffic Simulation using Agent-Based Modelling

Once upon a time I did a project at university on traffic simulation. In case you’re interested, here is some information about it.

I used NetLogo, an agent-based modelling (ABM) environment, to design and implement a simple working traffic simulation model.

This is quite a cool piece of software and if you’re interested in multi-agent modelling I recommend you check it out. There’s loads of online models you can run in your browser.

You can read more about the project here.