I recently posted a short introduction to the Sitecore FXM on the e3 blog, below is a more detailed version!
 One new feature in Sitecore 8 is the Federated Experience Manager (FXM). This is a brand new tool designed to allow you to apply Sitecore’s marketing features to existing non-Sitecore sites. This would be ideal for clients who are investing in the Sitecore platform but also have legacy sites which aren’t being redeveloped into Sitecore. For example, associated WordPress blogs, Drupal communities, even flat microsites could contribute to a user’s Sitecore Experience profile and affect personalisation across all these sites. I’ve had a chance to experiment with this tool and this is what I found.
This new tool is an option in the new Sitecore Launchpad. It presents you with a list of sites that you have added already, along with number of visits that have been tracked through the FXM:
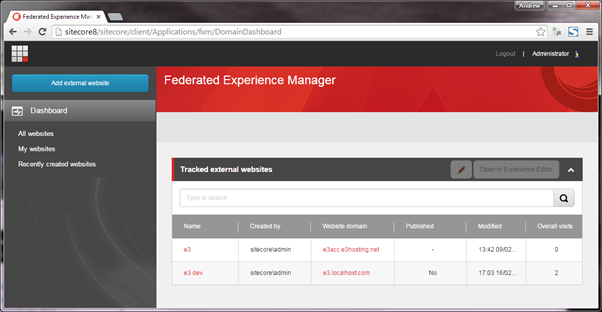
After creating a federated site they show in this list. For testing purposes I have added the e3 test website as a federated site. You need to enter the site’s domain and then paste some tracking script onto every page of the target site. The details of my federated site are as follows:
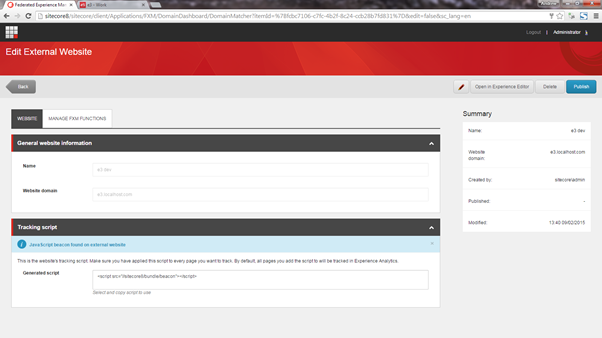
Now comes the fun bit. Clicking on “Open in Experience Editor” brings up a new version of the Experience Editor, geared towards being able to edit federated sites. In my instance, here you can see the e3 homepage showing up within the experience editor of my fresh Sitecore 8 instance:
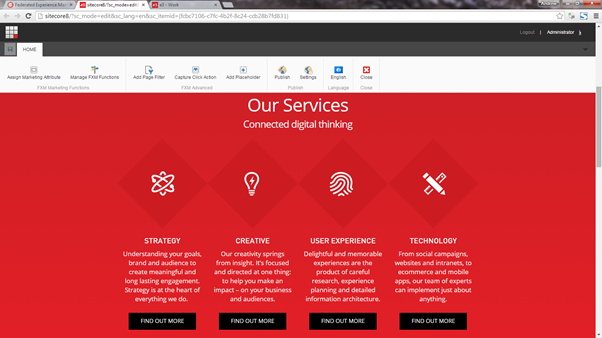
From this visual editor you are able to do various things such as:
- Attach Sitecore functionality to links / button clicks (such as triggering a goal)
- Assign goals/campaigns/events to trigger when certain page(s) are viewed
- Add Sitecore placeholders at any point within the existing site, to inject new content or replace existing content
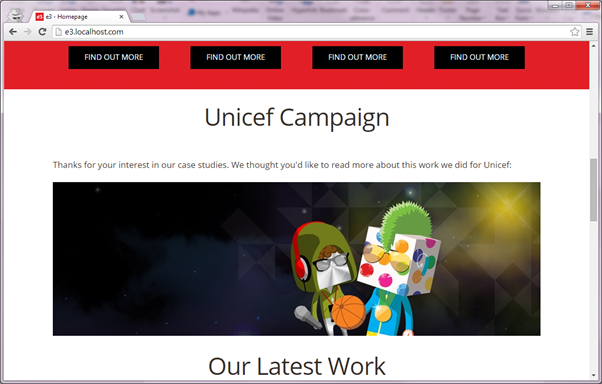
As a basic example, we could trigger a goal when a user views a case study and then display a personalised block on the homepage to highlight a particular case study, such as this one about Unicef Launchpad.
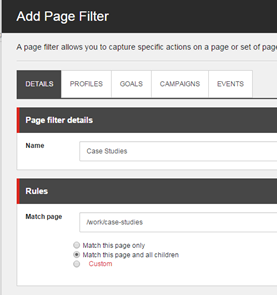
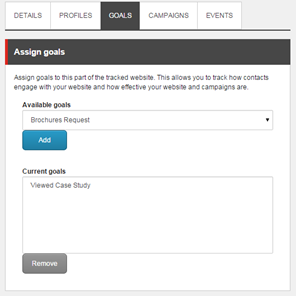
The first thing you must do is add a Page Filter. This is how Sitecore will target your personalisation to decide which page(s) it affects. Here we create a filter to match all case study pages, and assign a custom “Viewed Case Study” goal I made earlier:
Next, for the personalisation on the Homepage, I can click “Add Placeholder” and then click on a part of the page. This selects the component I have clicked and gives a choice of adding before or after that component:
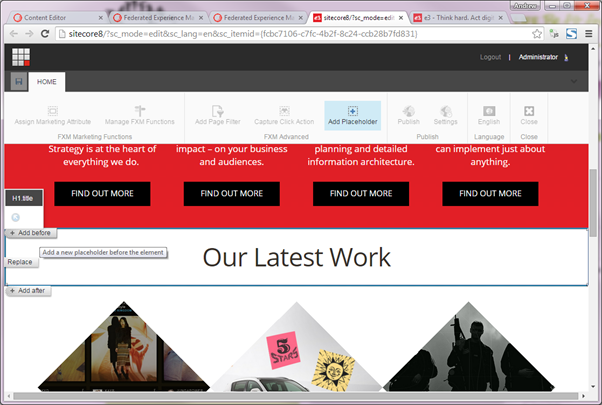
In this case I have chosen “Add before” as I want to add a new component in above “Our Latest Work”. Once the placeholder is added, I can add any existing Sitecore layout in the new placeholder (for example any design component you already have built for your Sitecore site), and display the desired content. The federated site may need updated CSS to correctly display design elements from the Sitecore site, otherwise they might appear unstyled. Once I’ve finished adding the new component it looks like this:
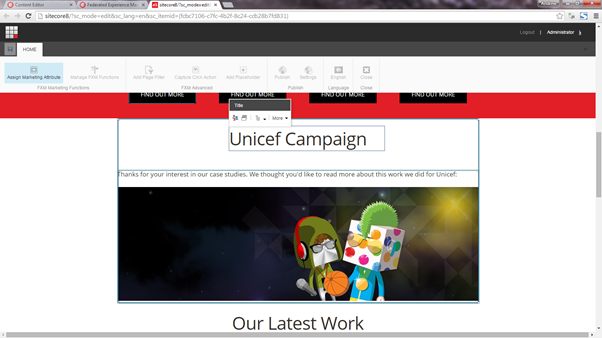
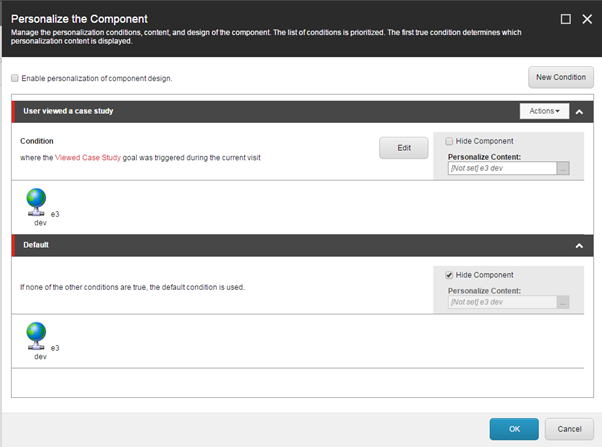
By default this new content will display all the time. The final step is to apply some personalisation to the new block. To do this, I can select the block and choose Edit personalisation from the floating toolbar:

The following personalisation settings will show the custom content if the user has viewed a case study, otherwise hide the component. You could add multiple conditions in here to display different content depending on the user’s activity.
Once all this is done and published, I can browse to the target site and it appears as normal. If I browse to any case study and then back to the homepage, I can see the new component has been injected into the page’s content:
There are many possibilities in terms of the personalisation logic you could apply, and this new ability to apply marketing features to external sites really adds a new dimension to Sitecore’s experience platform.