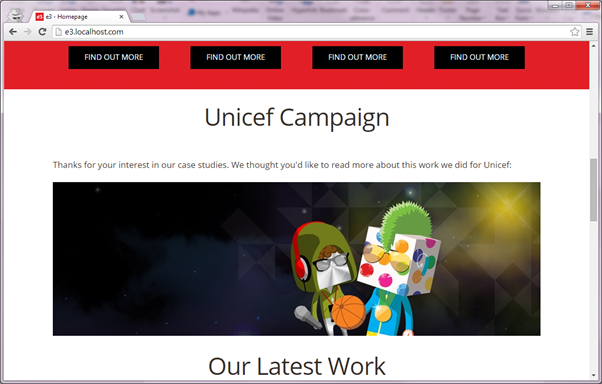
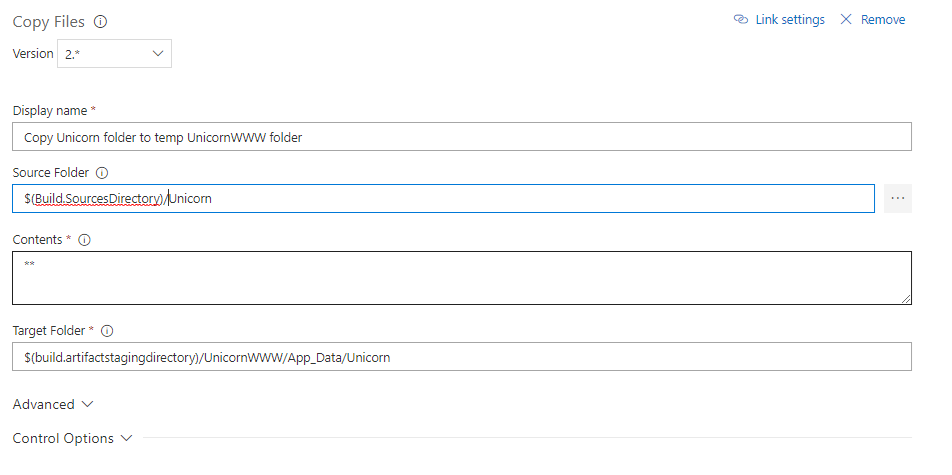
After a normal, successful, code deployment to a Sitecore 10.2 XP site hosted in Sitecore Managed Cloud (PaaS – App Services) we found this screen on the CM instance “Stay tuned we are updating…”

TL;DR how to fix:
- Browse to SCM for the CM site e.g. mc-012345-cm.scm.azurewebsites.net
- Go to Debug console
- Delete site\wwwroot\app_data\Maintenance.lock
- Go into site\wwwroot
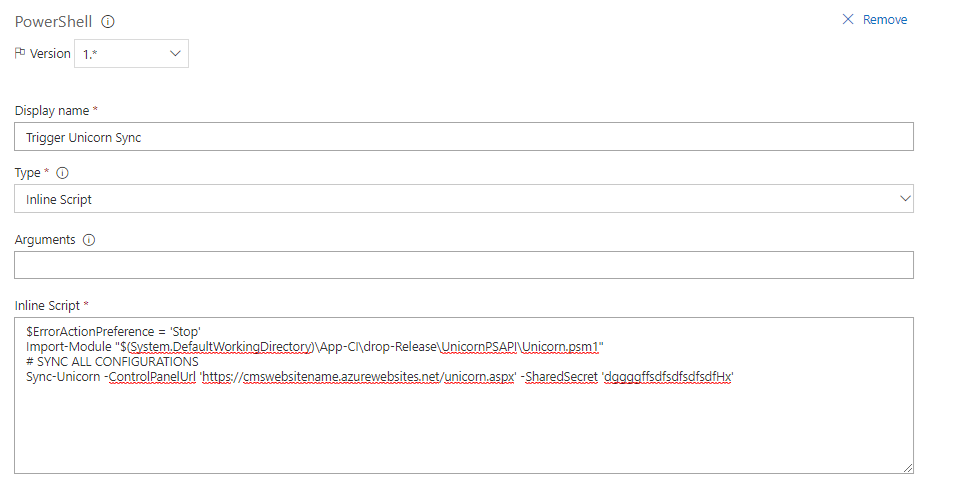
- Run this via the console: `app_data\tools\installjob\Sitecore.Cloud.Integration.Bootload.InstallJob.exe .`
After searching for this I found some helpful posts including https://www.asmagin.com/posts/2019/01/stuck-on-stay-tuned-page-after-scwdp-package-deployment/ but as this is so peculiar I wanted to keep notes of my own investigation into the reason for this screen, which seems to be caused by an AppOffline.htm file in my site folder… but why is it there?
First I went to scm and attempted to manually run the bootloader as per the above blog, which sure enough exists in the app_data\tools\installjob folder (must be part of Sitecore Managed Cloud 10.2 deploy as we haven’t put it there).
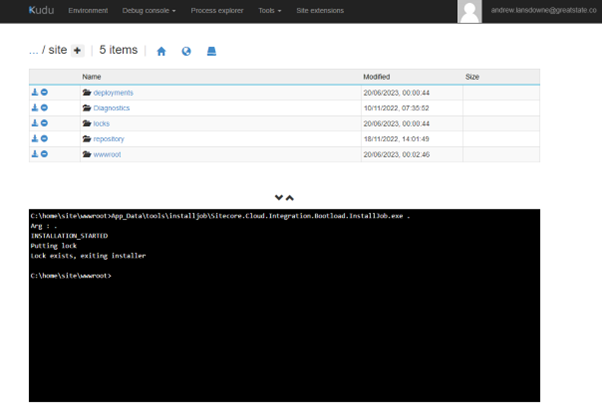
Looks like there is a file App_Data\Maintenance.lock , so I deleted that and then retry:

Well it seemed to work this time and the site came back up. So that is a bit of a mystery.
Later on I found “InstallJob.log” files in /home/LogFiles (thanks to pointers in \App_Data\tools\InstallJob\Sitecore.Cloud.Integration.Bootload.InstallJob.exe.config)
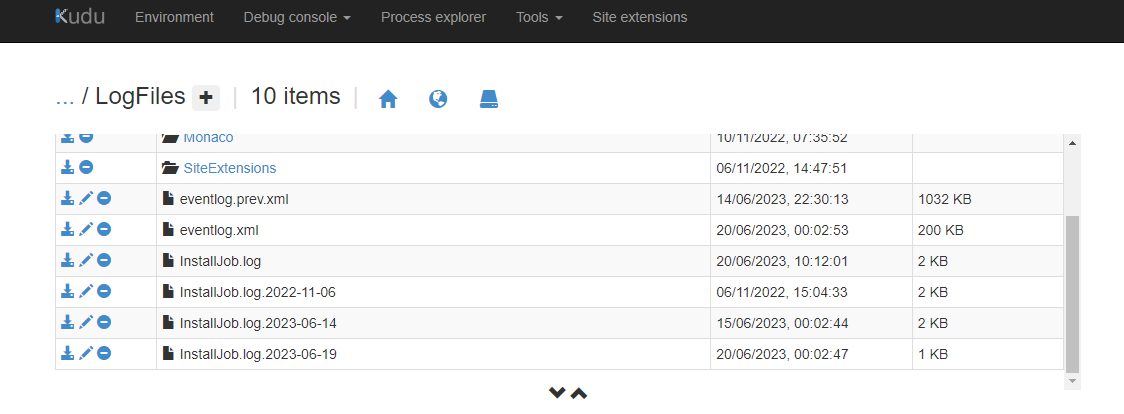
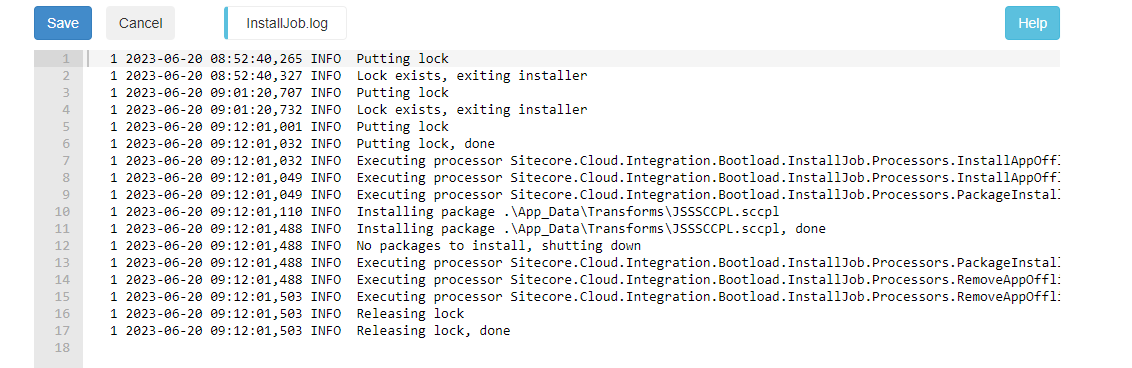
Sure enough seems like there was an aborted installation job yesterday that installed the AppOffline file even though according to the log it was supposed to be “exiting installer”

Then the log from this morning shows it failed to run a few times but did nothing until 9:12 which was when I deleted the Maintenance.lock file and re-ran it manually.
Digging deeper into what this all is:
In our case we have Sitecore Headless Services 20.0.2 installed and to ensure the correct files are deployed to each environment I am deploying the files from the “Sitecore Headless Services Server XP 20.0.2 rev. 00545.scwdp.zip” file , which turns out to include the JSSSCCLP.sccpl file inside App_Data\Transforms. This is a zip file as described in https://doc.sitecore.com/xp/en/developers/sat/28/sitecore-azure-toolkit/the-structure-of-an-sccpl-transformation.html

This particular zip contains one web.config XDT transform which is to add the jss media handler:

The docs mention bootloader in relation to ARM templates (which we aren’t using since the deployment was done by Sitecore Managed Cloud) but don’t mention any detail about how it processes files on app startup https://doc.sitecore.com/xp/en/developers/sat/28/sitecore-azure-toolkit/configure-the-bootloader-module-for-a-sitecore-deployment.html
I assume that the installjob.exe runs automatically on app start and processes all the files found somehow.
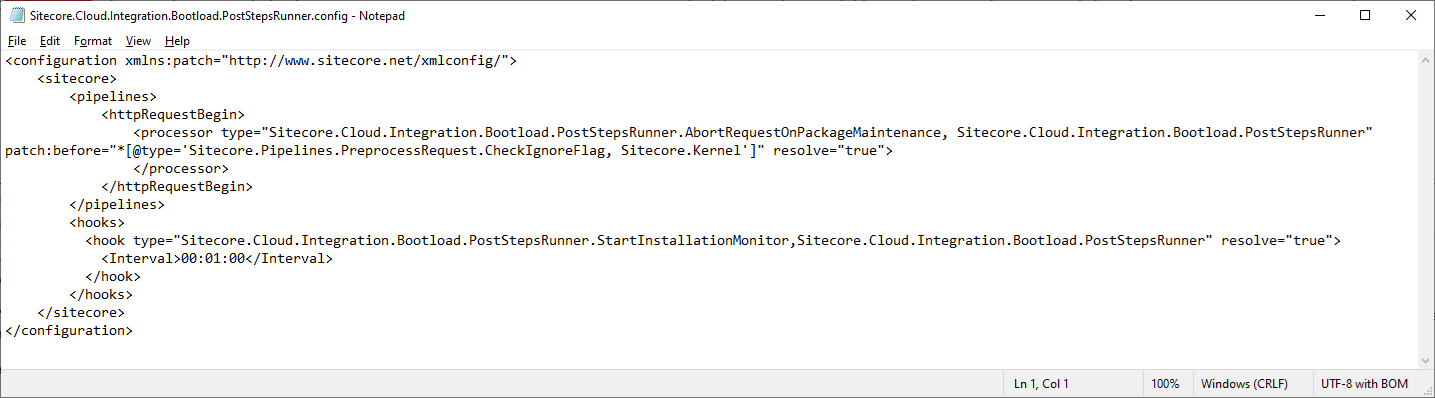
I found the file that actions this (?) as mentioned in another blog post in \App_Config\Sitecore\Azure\Sitecore.Cloud.Integration.Bootload.PostStepsRunner.config
Still not clear how this all ties together.. then I found this helpful post https://kezhan.info/2018/02/26/All-about-SitecoreCloudIntegrationBootload although that is for Sitecore 8 but it sounds like much the same today.
So it sounds like Sitecore Managed Cloud deploy the Bootloader WDP from Sitecore Azure Toolkit into all Sitecore Managed Cloud sites, and this in turn monitors \App_Data\Transforms and installs any package found in there…


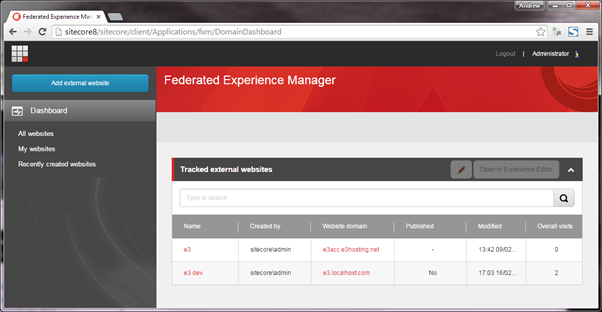
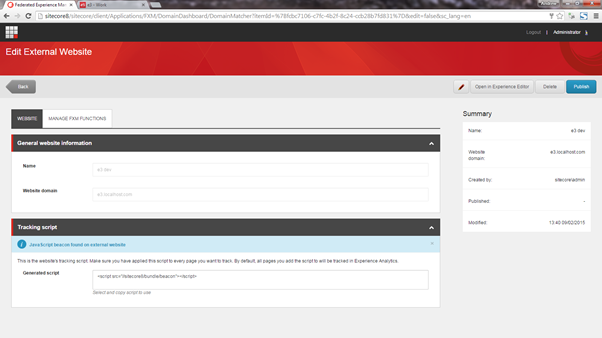
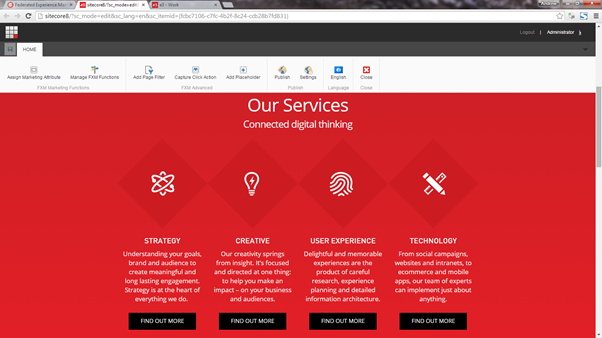
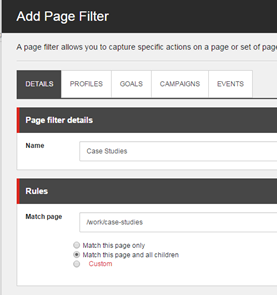
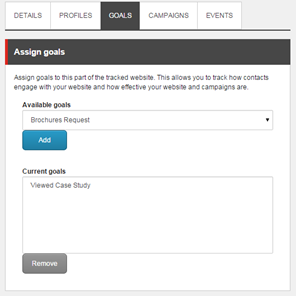
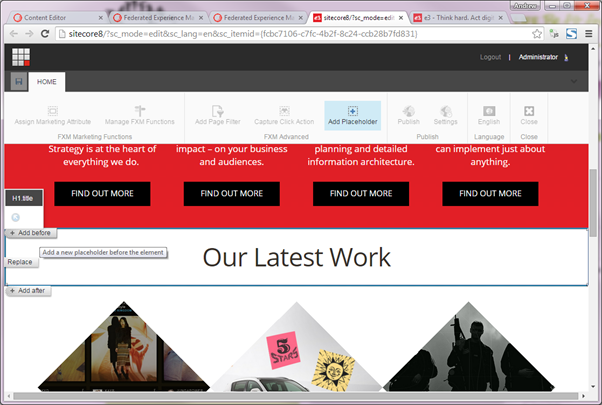
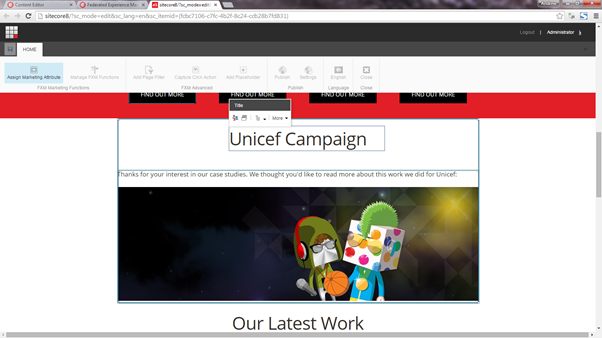
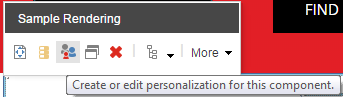
 One new feature in Sitecore 8 is the Federated Experience Manager (FXM). This is a brand new tool designed to allow you to apply Sitecore’s marketing features to existing non-Sitecore sites. This would be ideal for clients who are investing in the Sitecore platform but also have legacy sites which aren’t being redeveloped into Sitecore. For example, associated WordPress blogs, Drupal communities, even flat microsites could contribute to a user’s Sitecore Experience profile and affect personalisation across all these sites. I’ve had a chance to experiment with this tool and this is what I found.