29/09/17 – Updated to cover new build/release editor. Screenshots still show the old editor. Also sorry about the double quotes in the code snippets, they are being replaced with pretty ones and you have to use normal ones, I’ll sort it out sometime.
We are using Visual Studio Team Services online for source code, task and release management.
For build and deployment we typically create multiple configurations in the project for each environment (e.g. DevCMS, DevWWW, etc) and use config transforms to make changes to the config. While it is easy to set up and maintain, there are a few downsides to this:
- Potentially sensitive configuration settings are checked into source control (passwords, connection strings)
- A separate build is required for each environment
Azure websites do allow you to override app settings and connection strings at runtime via the portal, but this doesn’t help with other settings or files. Better would be to use environment variables within the release process. VSTS releases allow just this, in the release definition you can set up variables and set them per each environment:
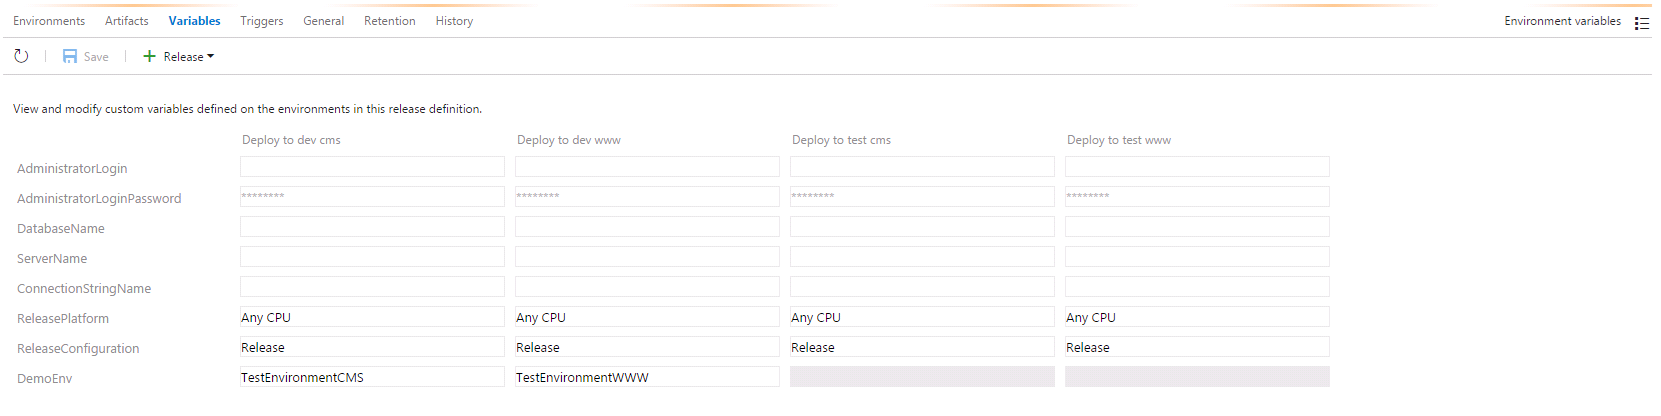
The question is, how to get the variables set here to update your config files at deploy time. One way I have found to do this is as follows.
Step 1. Add Parameters.xml file to the website project.
This file defines the values that need to be updated. This can replace tokens in any text file, xml files have better support using xpath to target attributes/values to replace.
<?xml version=“1.0” encoding=“utf-8“ ?>
<parameters>
<parameter name=“DemoEnv” description=“DemoEnv” defaultValue=“#{DemoEnv}#” tags=“”>
<parameterEntry kind=“XmlFile“
scope=“obj\\Release\\Package\\PackageTmp\\Web\.config$“
match=“/configuration/appSettings/add[@key=’DemoEnv’]/@value“ />
</parameter>
</parameters>
For the defaultValues, set the value to a token that can be replaced during release. In this example I am using the default token format used by the Replace Tokens utility described later.
I have to credit this post from Colins ALM for explaining this, although it is about TFS the first half still applies.
http://colinsalmcorner.com/post/webdeploy-and-release-management–the-proper-way
Note that connection strings are special and the values are replaced with tokens automatically during package creation. The original value is placed into the SetParameters.xml file. So to get your own token in there, you either need to add a config transform and replace your local connection string with a token, or follow the link above and set up a publish profile that defines a connection string token that will be used in the package.
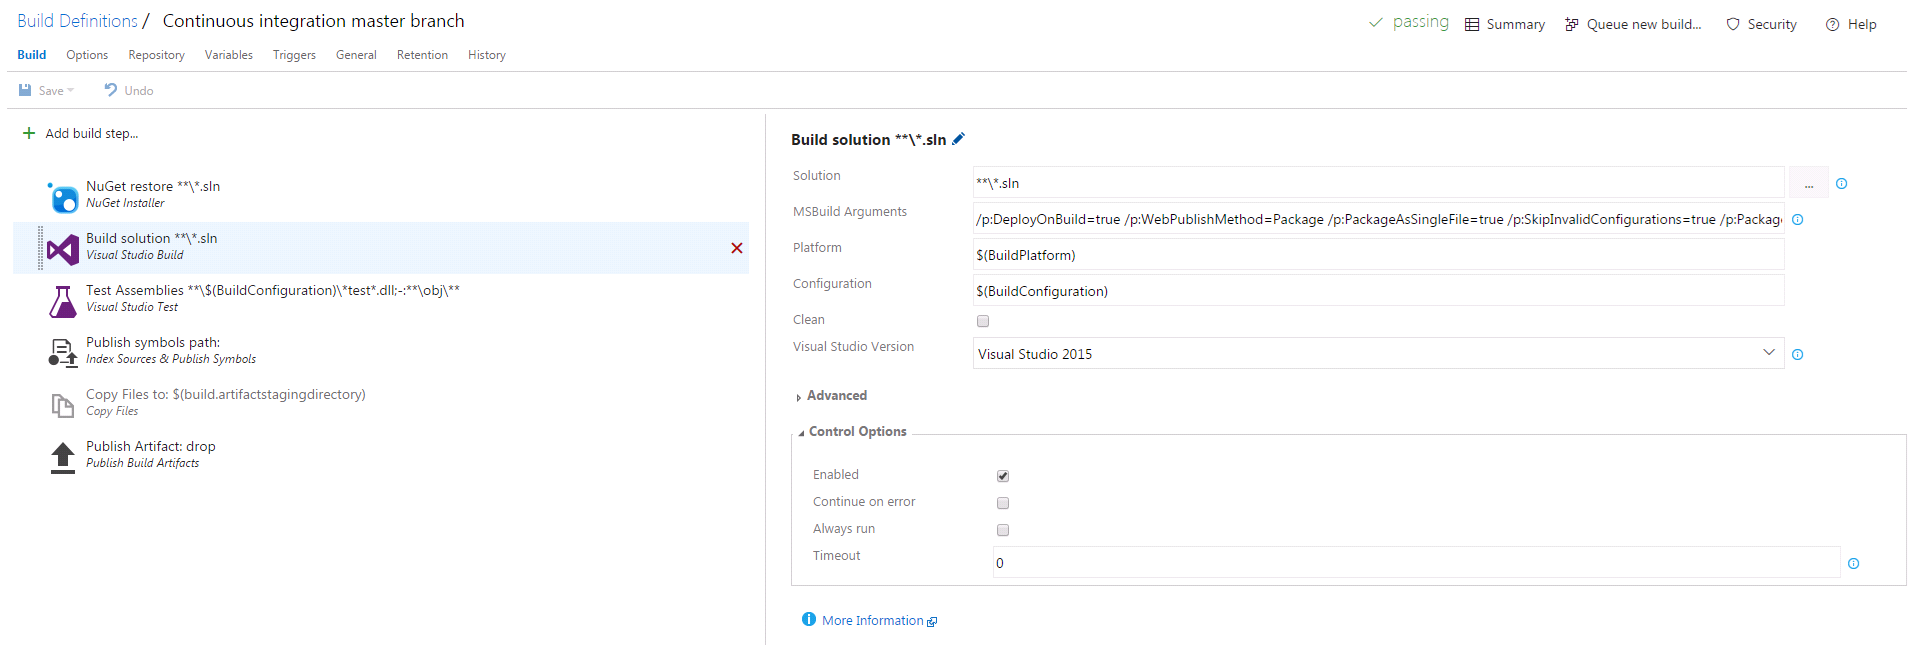
Step 2. Configure the build to generate a web deploy package
This you can achieve by using a build task with MSBuild arguments as follows:
/p:DeployOnBuild=true /p:WebPublishMethod=Package /p:PackageAsSingleFile=true /p:SkipInvalidConfigurations=true /p:PackageLocation=”$(build.artifactstagingdirectory)\\”
On build it will generate a zip file and a SetParameters.xml file which has just the values from the Parameters.xml that you created earlier:
<?xml version=“1.0” encoding=“utf-8“?>
<parameters>
<setParameter name=“DemoEnv” value=“#{DemoEnv}#“ />
</parameters>
This is ideal to replace at release time with a simple token replace task.
Step 3. Set up release definition
In the release definition, add a separate environment for each environment.
Each environment has a list of tasks. First I have added a Replace Tokens task using this add-on from the marketplace.
This is configured to set the root directory to the drop folder from the build, and target files set to the name of the SetParameters.xml file output by the build. The
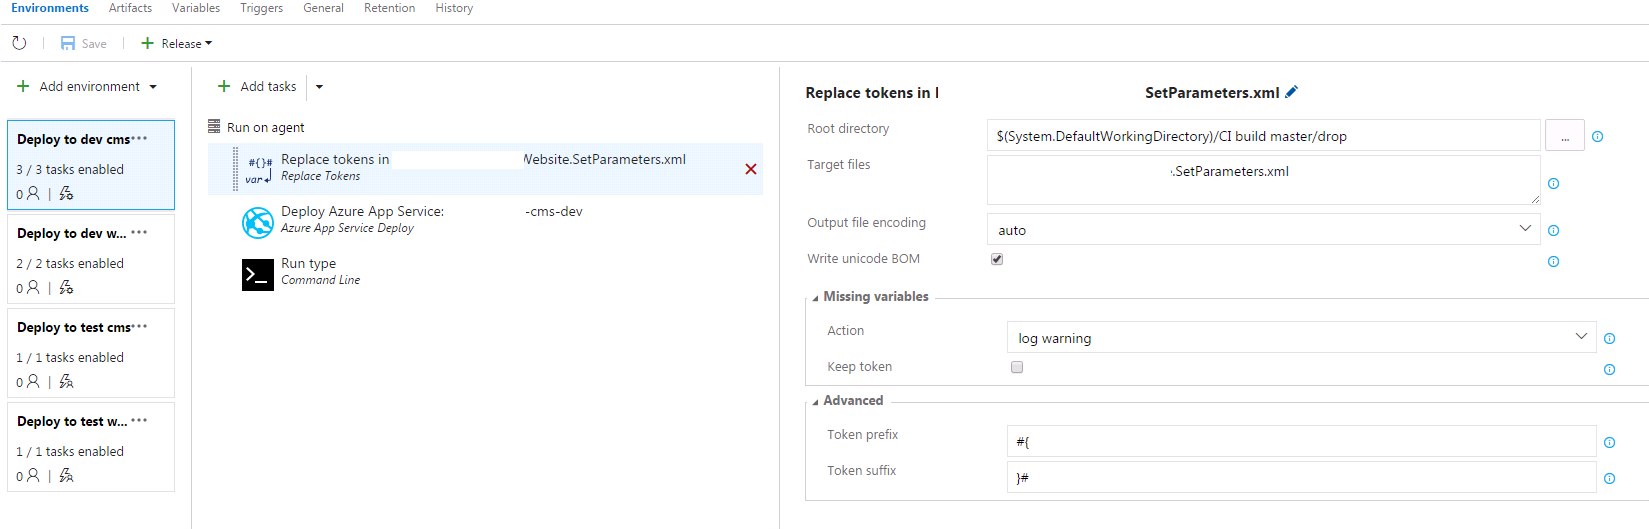
This will replace any variables defined with the values set in the release variables, which you can edit via Configure variables (old editor only):
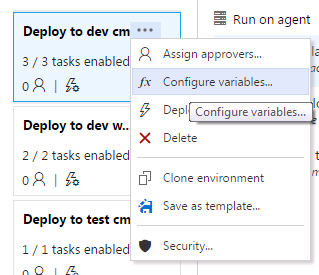
Or on the Variables tab as shown at the top of this post (old and new editor – for old editor, switch using the dropdown at the top right from Release variables to Environment variables).
Step 4. Set up deployment step
The deploy step for us is a normal Azure website deployment which uses web deploy. This defines the subscription, web app, slot, and web deploy package.
The important thing to set is the SetParameters file additional option which needs to point to the SetParameters.xml file that you did the token replacement on:
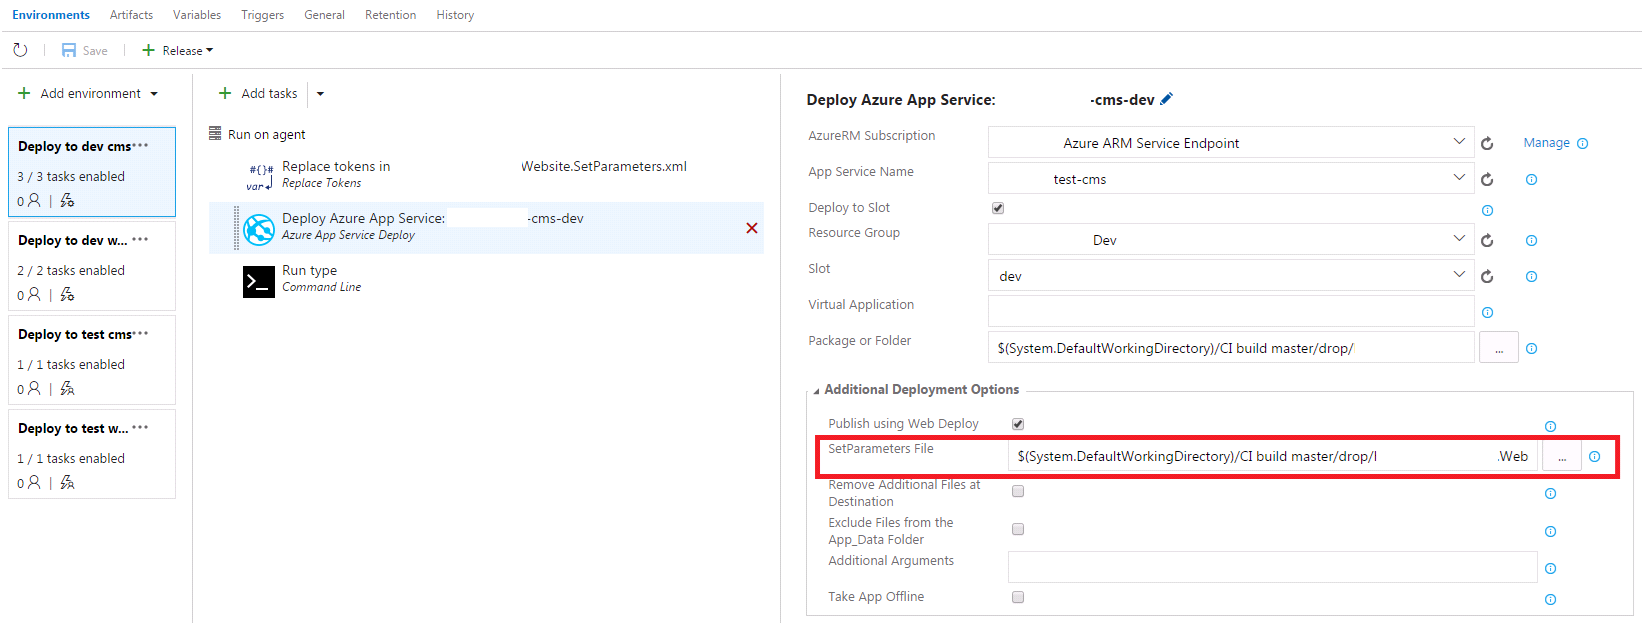
NOTE: You have to tick ‘Publish using Web Deploy’ for the SetParameters box to appear.
If you have issues with the token replacement, you can use a command line “Type” command to output the replaced version of the SetParameters.xml file to the release log that you can check has been replaced properly.

References:
http://www.colinsalmcorner.com/post/config-per-environment-vs-tokenization-in-release-management
http://colinsalmcorner.com/post/webdeploy-and-release-management–the-proper-way
One thing to note, I found that if you change the environment variables, and trigger a release, it won’t overwrite the web.config. It requires a new build. I think this is because web deploy uses the file date/size from the package to compare against the site, and this isn’t changing, so it doesn’t replace it. If anyone knows a way around this, let me know!