Category Archives: TeamCity

DLL assembly versioning in TeamCity builds

A nice thing to do when deploying code from a CI server is to embed the build version number into the DLLs, so if someone isn’t sure what code ended up in that environment, they can check the version rather than decompiling the DLL.

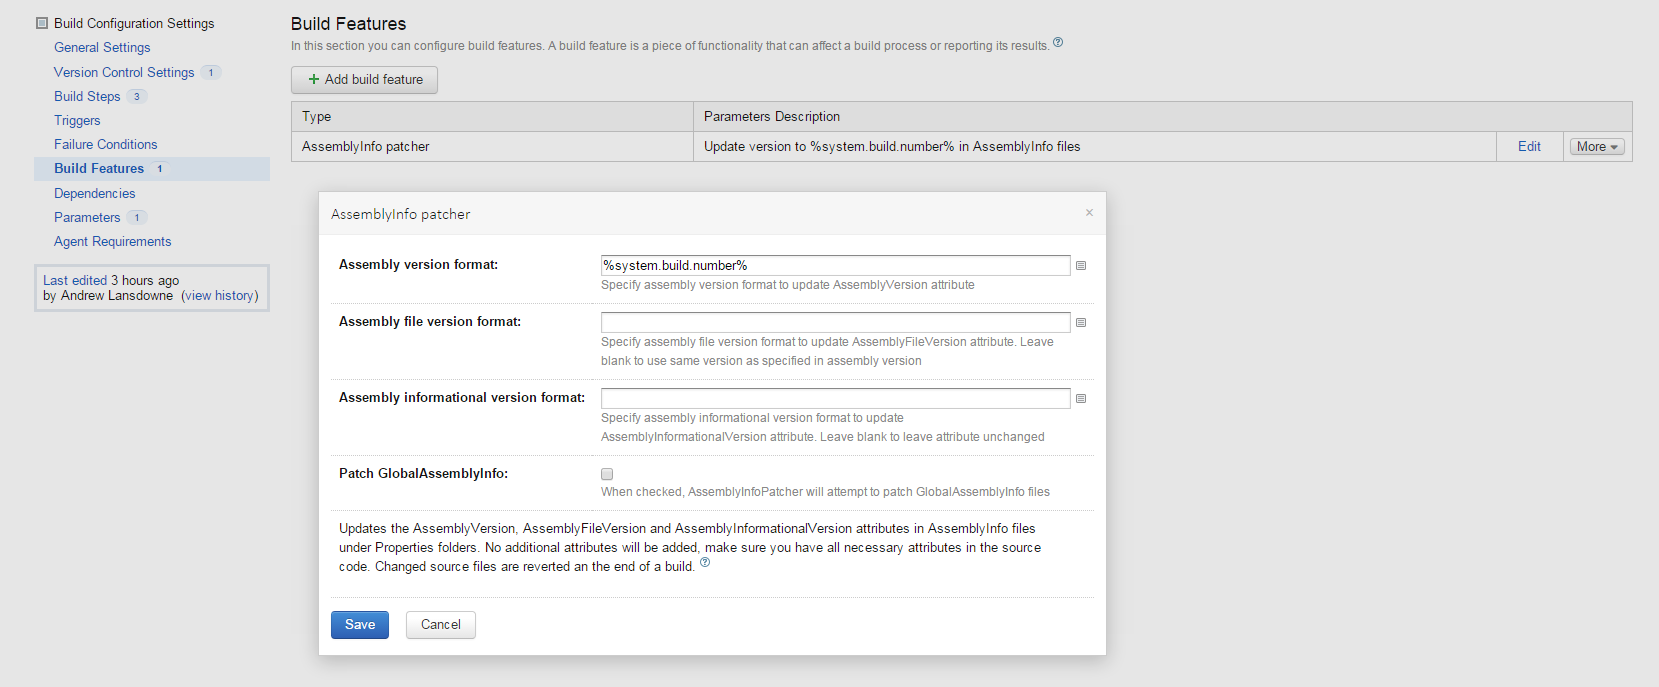
This is very easy in TeamCity, Add the “AssemblyInfo patcher” build feature, with the default configuration:

tc1

Any confusion as to what build is deployed could then check the DLL version against TeamCity, look up that build and check what changes / revision were included.
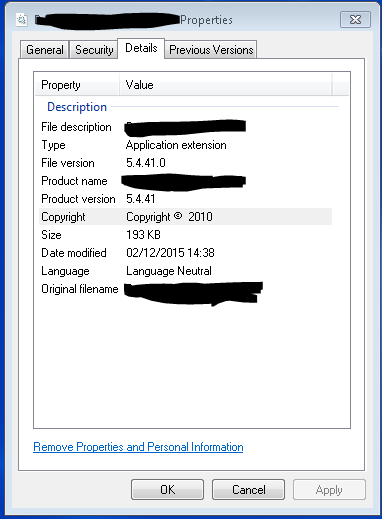
Some of our clients require us to supply packages which they deploy themselves. We supply web deploy packages. For these we provided numbered releases, and this is particularly useful in this scenario.

For these we also manually set the Build number to include the release number as well as the default build.counter e.g.

tc2

Then the DLL version will be like 5.0.42 which would mean release 5.0 built from TeamCity build# 42.

Alternatively you could embed the vcs revision number.
Selenium Automated Testing using C# and TeamCity

Introduction

Our QA team have started creating Selenium scripts to automate browser functional testing. These allow us to automatically run through a set of actions on a website and flag up any issues.

Running Scripts Manually

You will need:

To create/open/run a script:

  1. Open Firefox
  2. Open Selenium (should be button on toolbar otherwise ctrl+alt+s or alt, Tools, Selenium IDE)
  3. Follow selenium documentation to record/playback scripts

Automating Scripts via Unit Tests

We can convert the scripts into C# unit tests and run them via TeamCity. This explains how to set this up. You will need:

  • First follow the above to create the test suite you wish to convert and ensure you can run scripts manually
  • Download Selenium Server from http://www.seleniumhq.org/download/ and store the .jar somewhere you can run it from. 
  • Run Selenium Server using Java (put this in a .bat file next to the .jar file and double click it:
    • “C:\Program Files\Java\jdk1.8.0_20\bin\java” -jar selenium-server-standalone-2.43.1.jar
  • Visual Studio 2013
  • Install NUnit from http://www.nunit.org/
  • NUnit Test Adapter (extension for VS 2013)
  • A .NET solution open to add the unit tests into

First prepare the solution for selenium unit tests:

  1. Add a new project (C# Class Library) suggest something like SiteName.SeleniumTests
  2. Right click the new project, Manage Nuget Packages, install the following:
    1. NUnit
    2. Selenium Remote Control (RC)
  3. Create a folder in which to place the unit tests (e.g. grouped like NewUserTests or just Tests)
  4. In Selenium IDE, choose File, Batch convert test cases, C#/Nunit/Remote Control
  5. Select your Tests folder as the destination folder
  6. Select all the test cases you wish to convert (html files) and they should be saved as C# files in the Tests folder
  7. In Visual Studio, show existing files, and Include in project all the generated .cs files
  8. Build (fix any compilation errors)
  9. Open Test > Windows > Test Explorer, this should show your tests (if not, rebuild)
  10. Close all Firefox windows (they can interfere with Selenium Server)
  11. Click Run All. Selenium Server should log the commands and launch Firefox to run the test.

To capture screenshots at the end of each test:

  1. Create a Screenshots folder in your unit test project
  2. In each .cs file, in Teardown method add the following line of code before selenium.Stop():
    1. selenium.CaptureEntirePageScreenshot(System.IO.Path.Combine(System.Environment.CurrentDirectory, @”..\..\Screenshots\” + this.GetType().Name + “.png”), “”);
  3. Run the test, screenshot should be saved into the Screenshots folder with same name as the test class.

Integration with TeamCity

To integrate into TeamCity, set up a build configuration to run the NUnit test with the following build steps:

  1. Compile selenium tests – Msbuild runner, point at Selenium.csproj file
  2. Run selenium tests – Nunit runner, run tests from (path to compiled DLL)

Set the Artifact paths setting on the build settings to point to the Screenshots folder to save the screenshots after each run.

To run via TeamCity the Selenium server must be running. You could start this manually same as above, hopefully this can be made to run automatically as a service but I’m not sure how.

Gotchas

Each test must be independent of any other as they may be run in any order, or perhaps only failed tests might be run. Also the server will restart the browser between each test so they can’t depend on the final state of the previous script (like they can in the IDE).

We’re going to try using New Relic Synthetics which has a feature for test automation – apparently you can upload a Selenium script and it can automatically run as and when, we have yet to try this out though!

Restore NuGet Packages for Solution using TeamCity

So you’ve used NuGet packages into your solution and not checked in the packages folder to source control. Visual Studio will download the packages upon build, but TeamCity will not and you will end up with a build error such as:

This project references NuGet package(s) that are missing on this computer. Enable NuGet Package Restore to download them. For more information, see http://go.microsoft.com/fwlink/?LinkID=322105. The missing file is ..\packages\UmbracoCms.7.1.4\build\UmbracoCms.props.

But, how to enable NuGet Package Restore on TeamCity?

UPDATE: It seems this is as easy as in Visual Studio, right click the solution and Enable Nuget Package Restore for Solution. I’m sure I tried this before and it didn’t work, but it seems to now!

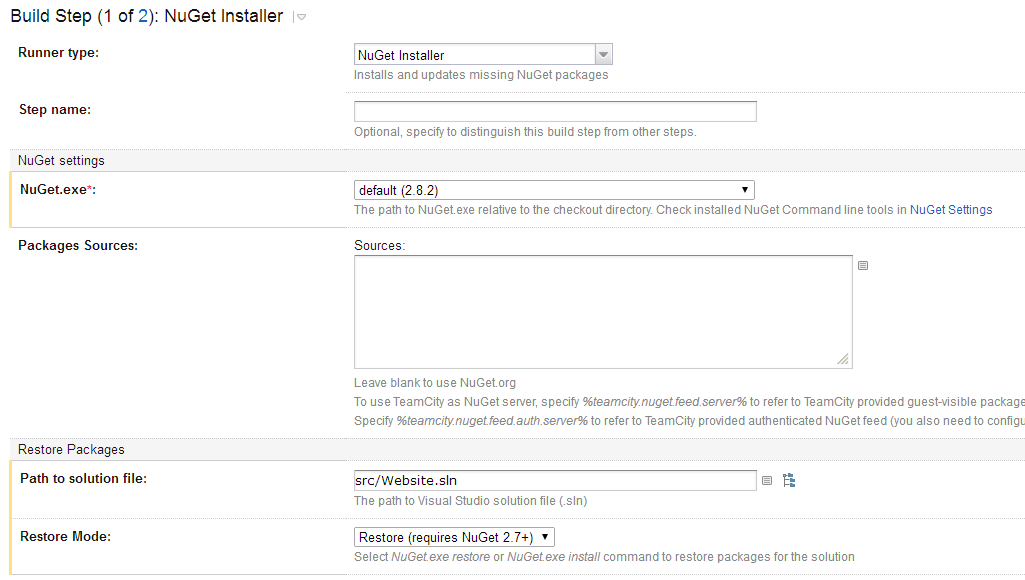
It’s quite easy. Just add a NuGet Installer build step (make sure to order it before the project build step):


All I specified is the NuGet version, path to solution file and Restore mode.

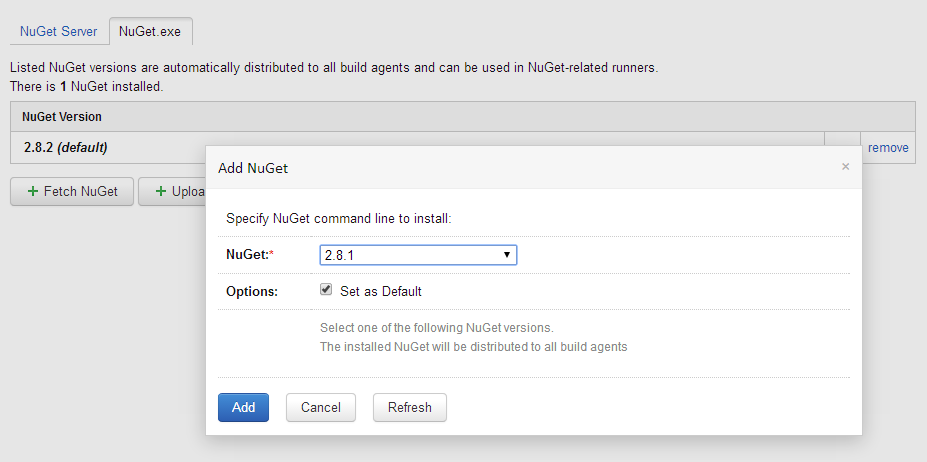
The first time you do this no default NuGet version will exist so you have to click NuGet Settings link and Fetch the latest version of NuGet.

Note that after this your build agents will disconnect to install the NuGet version.

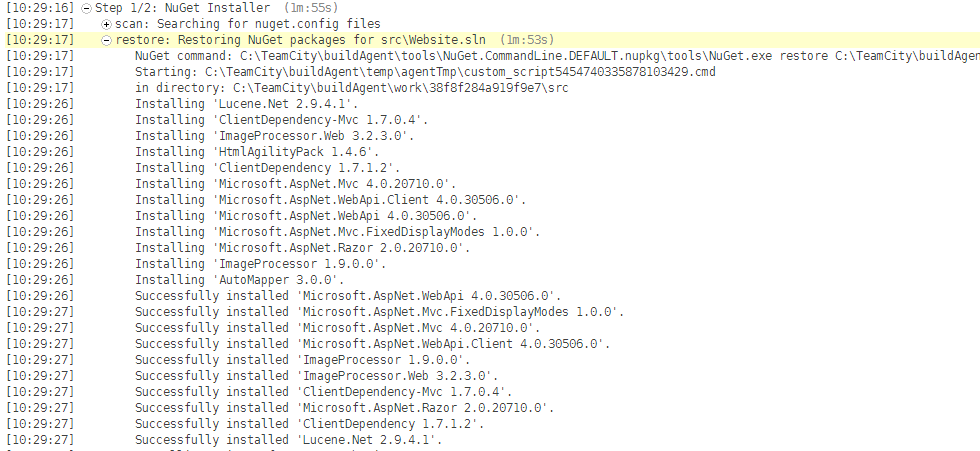
Then your build should succeed! Awesome!

Web Deploy Public Port 80 Warning

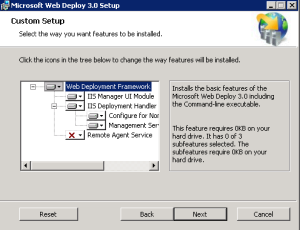
When installing web deploy DO NOT install the Remote Agent Service!

If you do, it will listen unsecured on public port 80 on the server, locked down only by username/password.

msdeploy


It listens at:

http://<site>/MsDeployAgentService

If it is running you can browse to that URL and it will ask for username/password. If this happens you should do a Change install and remove the remote agent service, or disable it!