I recently discovered the Unicorn project by @kamsar, which implements an event handler to serialize Sitecore items to disk when they are modified, and a sync script which restores them on request.
UPDATE: This post is based on Unicorn 1 and 2. For details of the latest version (4) see the Unicorn github page. Also I have published another blog post about getting Unicorn items up to Azure web app using VSTS.
There were a few things which I had to figure out when setting this up to use for continuous integration in our environment, so I will outline the process.
Install and configure Unicorn
First, install the Unicorn nuget package.
Second, configure it to work on only the developer-owned items in your Sitecore tree. For these items we will consider the ‘master’ copy is that in source control, just like your codebase. The configuration is in /App_Config/Include/Serialization.config and I modified mine thus:
<sitecore>
 <serialization>
  <default>
   <include database="master" path="/sitecore/layout/Layouts/SITE" />
   <include database="master" path="/sitecore/layout/Placeholder Settings/SITE" />
   <include database="master" path="/sitecore/layout/Renderings/SITE" />
   <include database="master" path="/sitecore/layout/Sublayouts/SITE" />
   <include database="master" path="/sitecore/media library/System/SITE" />
   <include database="master" path="/sitecore/templates/SITE" />
  </default>
 </serialization>
</sitecore>
Where SITE is a site-specific named folder containing all our site-specific items.
Next, serialize each of these Items using the Serialize Tree option in Sitecore’s Developer toolbar, and commit the serialized files from the $data/serialization folder.
From now on, when any of these items is modified in Sitecore, the corresponding file(s) will be modified and you can commit them along with code changes. These can be merged into your test / production branch along with other code.
Get the serialized files to be deployed
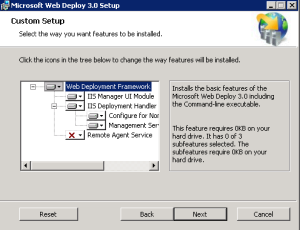
This step depends on your setup, but we set up our TeamCity CI to use WebDeploy to publish the Web Application Project to the server as per Troy Hunt’s article.
To get our items to be deployed required two things:
- Serialization folder must be under Website. I moved it to /App_Data and changed the path in Web.config
- An additional build step to sync the serialization folder:
C:\Program Files\IIS\Microsoft Web Deploy\msdeploy -verb:sync -source:contentPath=%teamcity.build.checkoutDir%\www\Website\App_Data\serialization -dest:contentPath=%env.DeployIisAppPath%/App_Data/serialization,wmsvc=https://%env.TargetServer%,userName=%env.PublishUsername%,password=%env.PublishPassword% -allowUntrusted
This ensures that when the build runs, new items will be added and old ones deleted to match what is in version control.
Get the items to be installed on build
This is done by the sync-database.aspx script included with Unicorn.
It will install the items if you are logged in as an Administrator, or if you include an Authenticate header matching a preconfigured token.
So add an app setting:
<add key="DeploymentToolAuthToken" value="{GUID OR TOKEN HERE}"/>
And then to make TeamCity call the script with the token I used wget (install for Windows here) and added a command line build step in TeamCity with the script:
C:\Program Files (x86)\GnuWin32\bin\wget %env.SyncScriptURL% -O - --header=Authenticate:%env.SyncScriptToken%
Then, if the build is successful, the script will run and Sitecore DB will be updated. In case it fails it should return non-200 and TeamCity flags this as an error.
We decided it would be ideal to publish the items as well as installing them into master db, so I added the following code into the sync-database.aspx.cs :
 /// <summary>
 /// Publish the preset folder as per docs in http://sdn.sitecore.net/upload/sitecore6/64/content_api_cookbook_sc64_and_later-usletter.pdf
 /// </summary>
 /// <param name="preset"></param>
 private static void PublishPreset(IncludeEntry preset)
 {
  if (preset.Database == "master")
  {
   Sitecore.Data.Database master = Sitecore.Configuration.Factory.GetDatabase("master");
   Sitecore.Data.Database target = Sitecore.Configuration.Factory.GetDatabase("web");
   Sitecore.Data.Items.Item home = master.GetItem(preset.Path);
   Sitecore.Data.Database[] targetDatabases = { target };
   Sitecore.Globalization.Language[] languages = master.Languages;
   bool deep = true;
   bool compareRevisions = true;
   Sitecore.Publishing.PublishManager.PublishItem(home, targetDatabases, languages, deep, compareRevisions);
  }
 }
I call this code from within ProcessPreset:
new SerializationLoader().LoadTree(
 new AdvancedLoadOptions(preset)
 {
 Progress = progress,
 ForceUpdate = false,
 DeleteOrphans = true
 });

PublishPreset(preset);
Now my items are installed and published on deploy.


